
How to setup IPTV on Xbox One via Kodi?
yestream Engineering
yestream Technical Architecture Desk

Kodi, one of the most popular applications for streaming IPTV channels is now available to download for Xbox One on Xbox Live. This is excellent news for Xbox One owners, as the Kodi is an amazingly flexible and versatile software for streaming IPTV channels. With its vast support for third-party add-ons that can transform the software into a DVR, allow it to stream from numerous IPTV sources.

How to setup IPTV on Xbox One
In this tutorial, we are going to show you how to bring IPTV channels to your Xbox One console using Kodi.
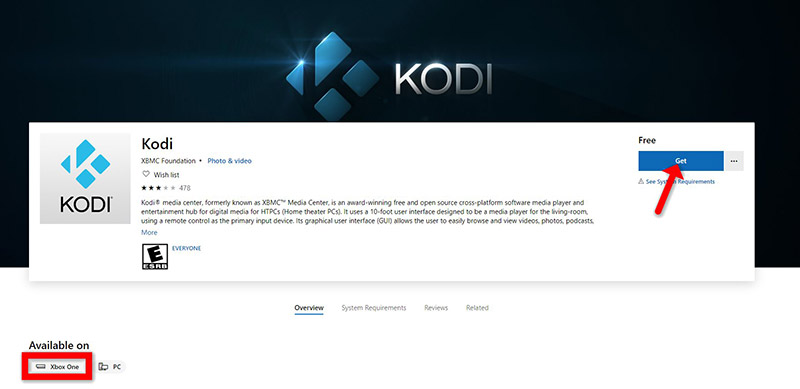
Step 1: Turn your Xbox One on and make sure it’s connected to the internet and that you’re logged in to your Xbox Live account. Go to the “Xbox Live store” and search for “Kodi”. If you don’t see it there, the app may have been momentarily removed from the Xbox Live store. Now install the app by clicking on “Get“.
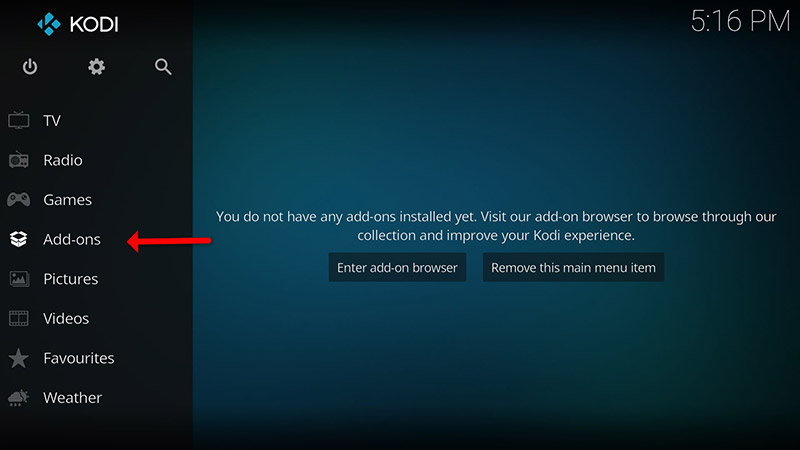
Step 2: When Kodi first loads up, it will appear quite blank. It doesn’t contain any add-ons or doesn’t display the videos you have on your hard drive. What we require are some add-ons.
Click on “Add-ons“.
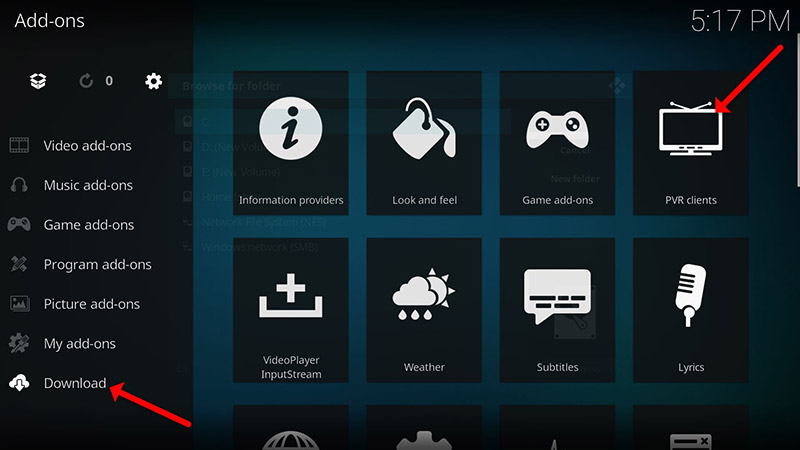
Step 3: Now click on “Download” then select “PVR clients“.
Note: We are going to download and install the PVR add-on here, after installing no need to go to the “Download“.
You can find the installed add-ons “My add-ons“
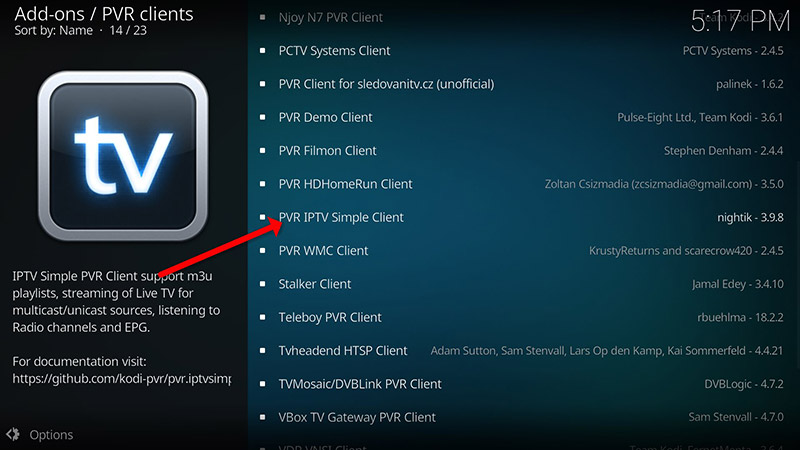
Step 4: Select “PVR IPTV Simple Client“.
Step 5: Now click on “Install“.
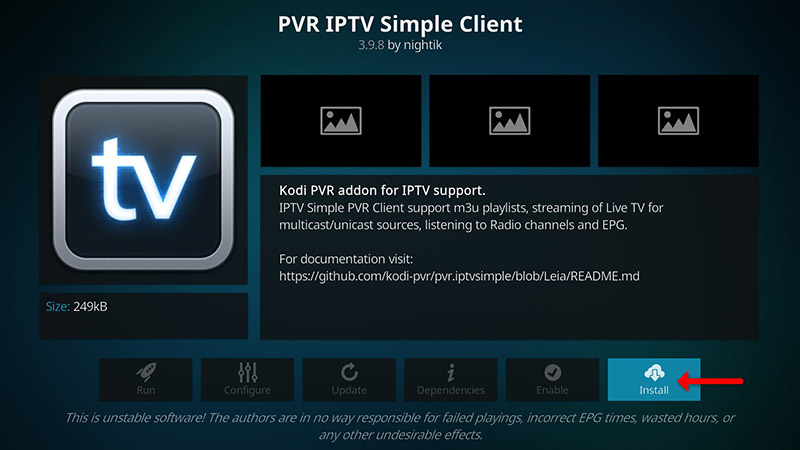
Step 6: After installing “PVR IPTV Simple Client” head back to “My add-ons” then “PVR Clients” and run the add-on.
Now click on “Configure“
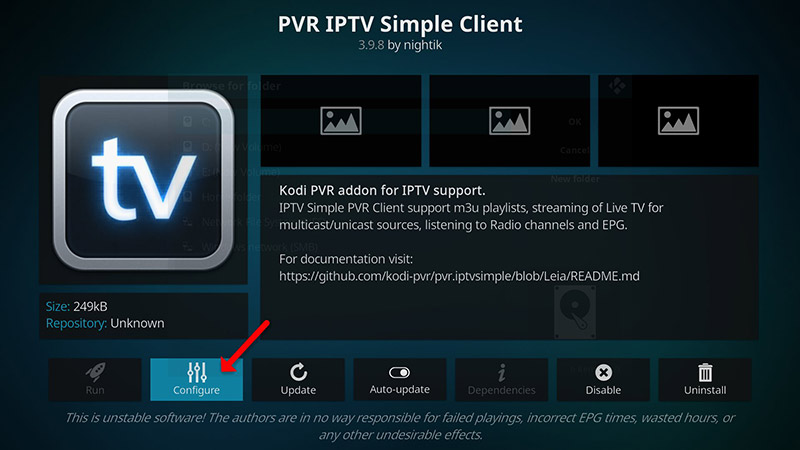
Step 7: Now select “M3U Play List URL“.
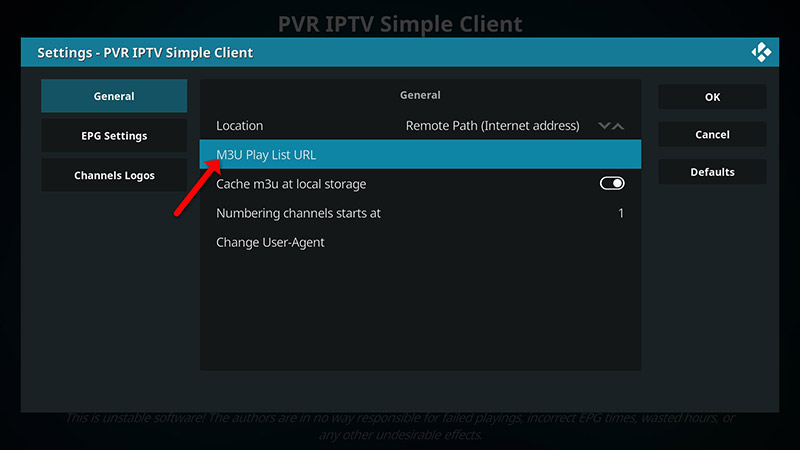
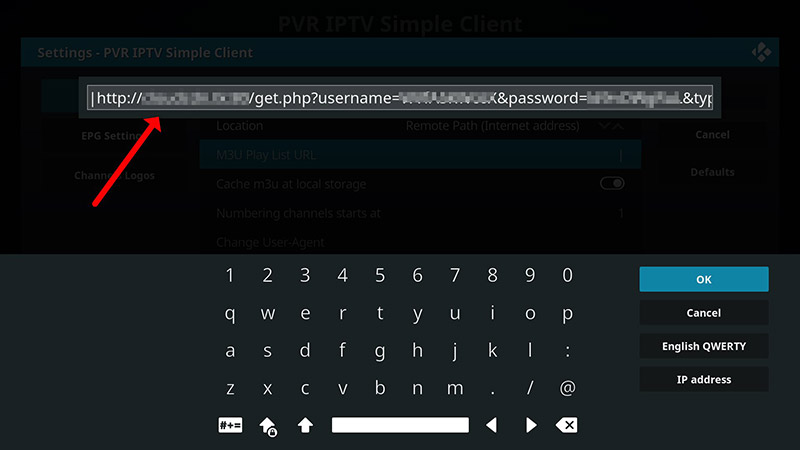
Step 8: Enter the M3U URL provided by your IPTV distributor and click “OK“.
Note: The progressive IPTV providers give you a dashboard which you can generate your M3U url in dashboard.
How to add EPG
Step 9: Now go to “EPG Settings” and click on “XMLTV URL” for EPG. What is EPG?
You can get EPG url from your IPTV provider.
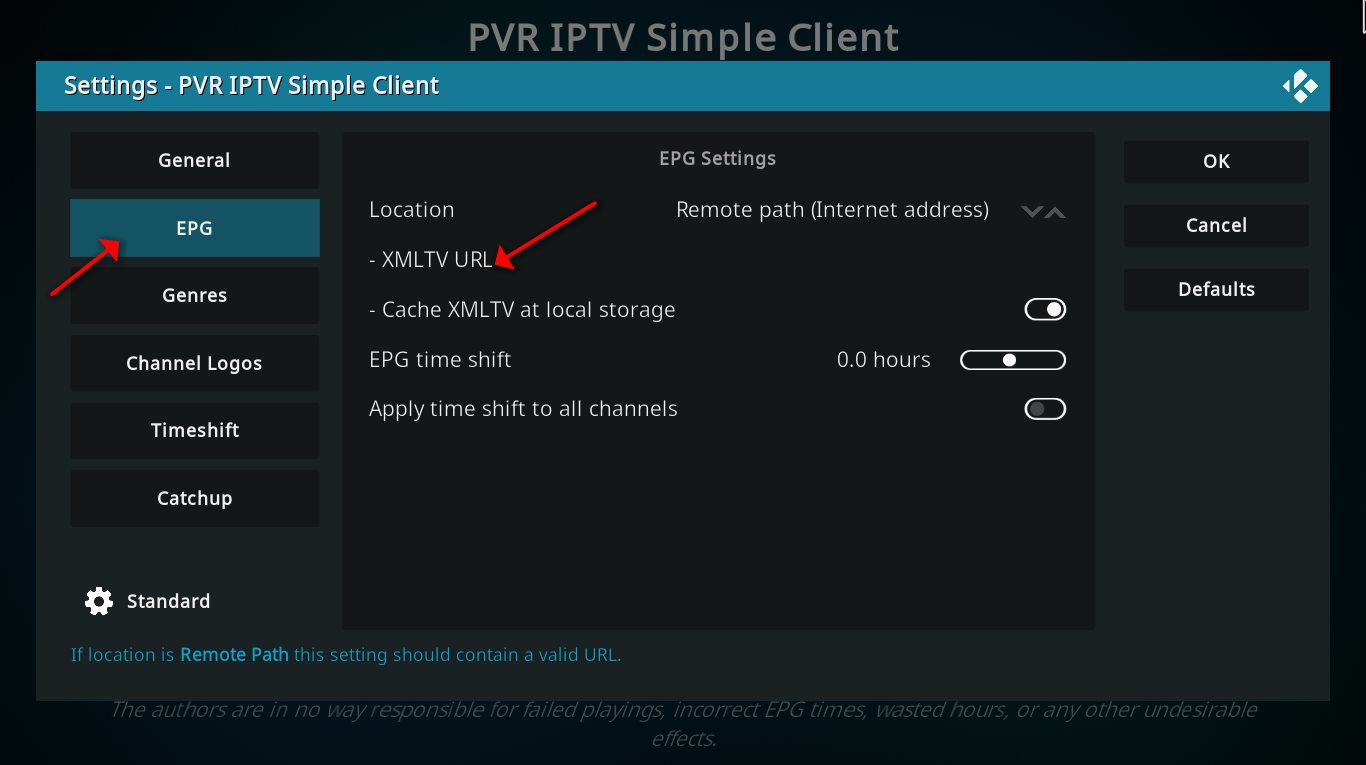
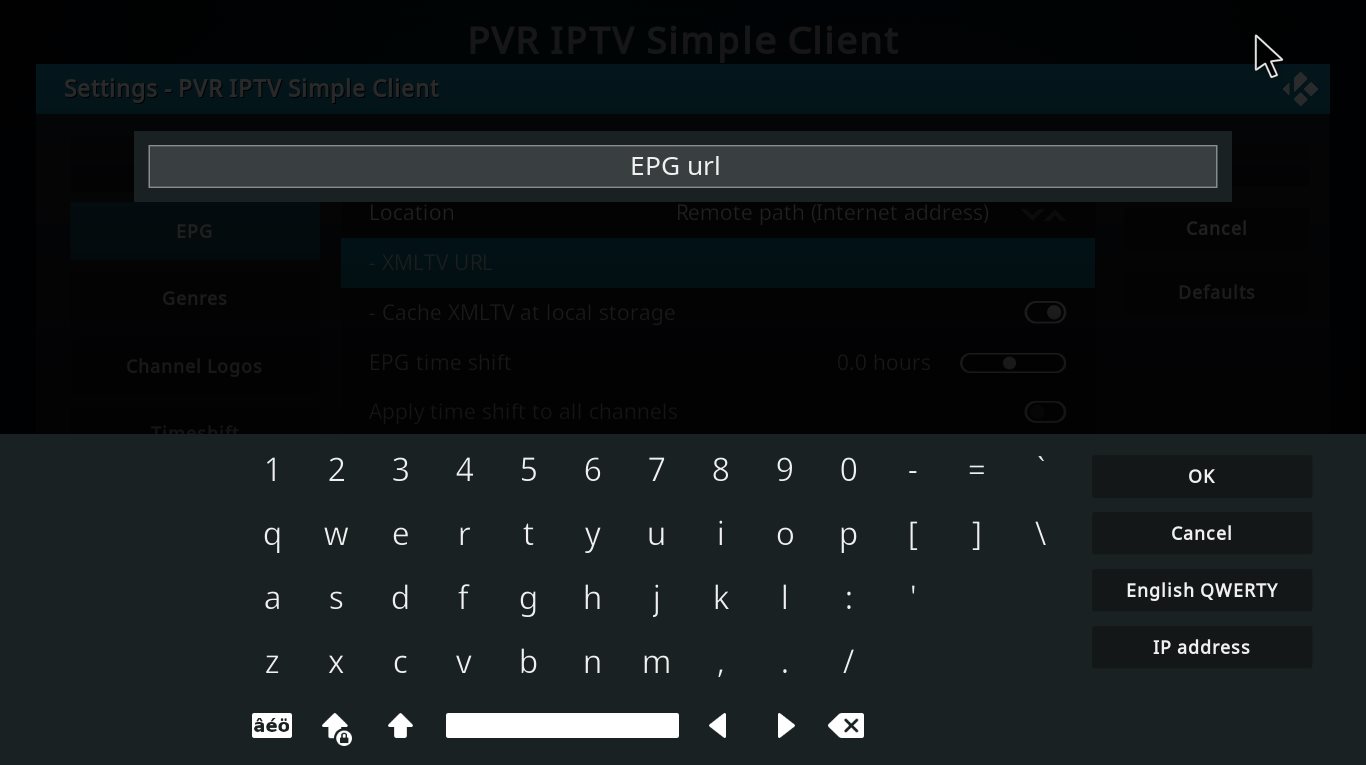
Step 10: Now paste your EPG URL and click “OK“.
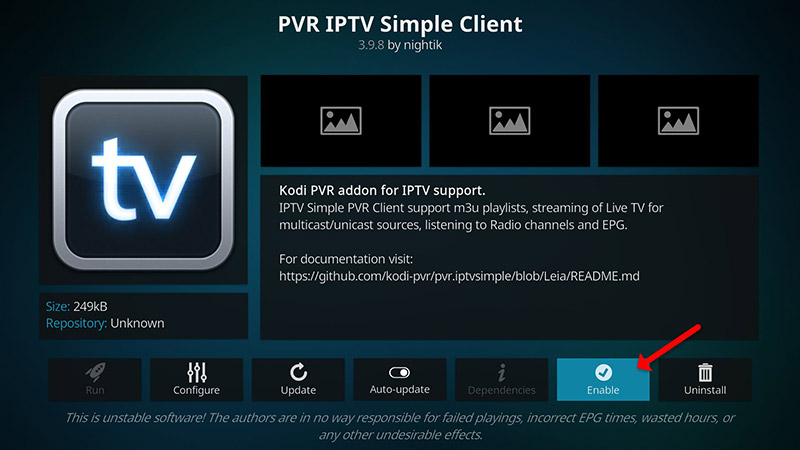
Step 11: Click on “Enable“.
Note: After you enable the add-on you will see “Disable”, this means the add-on enabled so do NOT to click on “Disable” again.
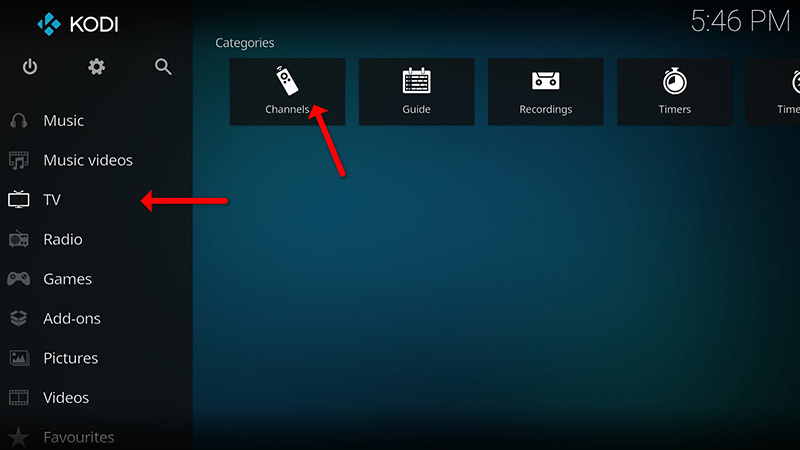
Step 12: Head back to “TV” and click on “Channels“.
Step 13: Wait until you see the notification about updating channels and the installation process is over.
Well done, you have IPTV channels now.
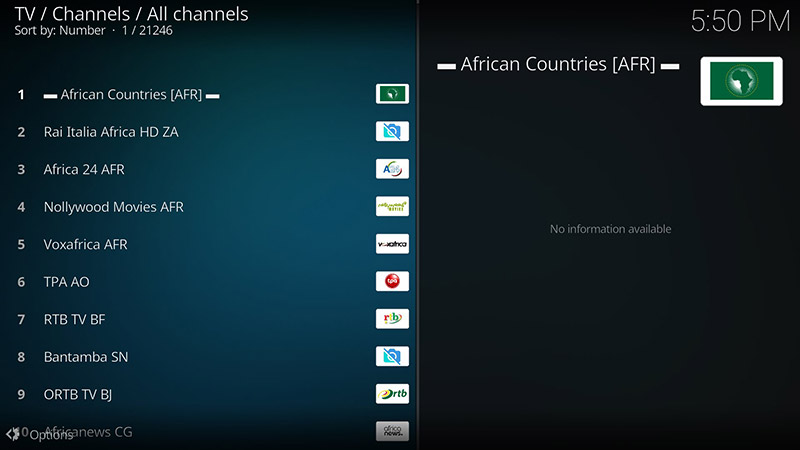
Please do not hesitate to ask your question in the comments if you need any further help.
Developed by yestream.net
Stream Seamlessly with yestream
Looking for a zero-buffering IPTV subscription for your device? yestream delivers over 25,000+ live 4K/FHD channels, full beIN Sports, Botola Pro Inwi, Sky Sports, and a 120,000+ VOD library with instant WhatsApp activation.
Stream 25,000+ Channels with Zero Buffering
Get full access to live sports, NFL, NBA, 4K Cinema, and trending TV series in 5–15 minutes with instant activation across all your devices.
Related Tutorials & Guides
How to Stop IPTV Buffering Forever: 9 Proven Fixes for Smooth 4K Streaming
Tired of constant buffering, freezing, or error loops? Follow these 9 proven technical fixes to eliminate stream stuttering on Firestick, Smart TVs, Android boxes, and Wi-Fi networks.
Wired Ethernet vs. 5 GHz Wi-Fi for IPTV: Which Is Best?
When setting up an IPTV service on a Smart TV, Firestick, or Android TV box, achieving a stable connection is critical for smooth, buffer-free streaming. While both Wired Ethernet and 5 GHz Wi-Fi offer more than enough raw speed for 4K and Full HD st
How to Fix IPTV Channels Buffering Only During Peak Hours?
Experiencing smooth, high-quality streams during the day, only for your channels to start buffering, looping, or freezing between 7:00 PM and 11:00 PM, is one of the most common issues with IPTV services. Because this buffering occurs strictly during